Choosing a model and quality
What the model and quality buttons in every tool do, what resolution controls, and what each costs.
Steps
Step 1 of 5
Two buttons: model on the left, quality on the right
Hero images, detail images, retouch and clothing all have this pair under “Settings”: the left one picks the model, the right one the quality. Together they decide how well the image is drawn. How big it is, you choose under “Resolution”.
Step 2 of 5
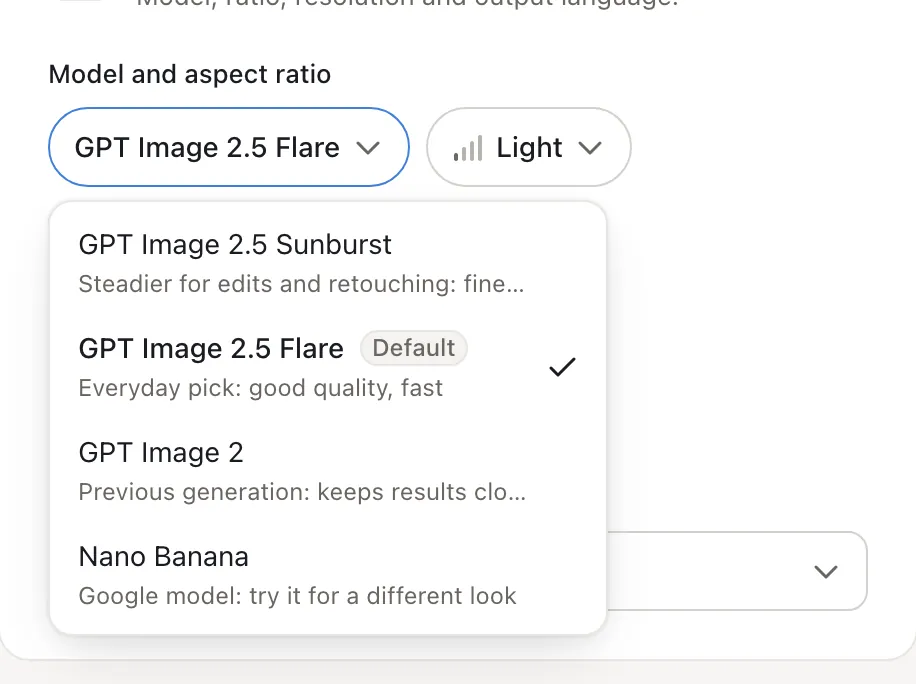
Model: Flare for everyday work
“GPT Image 2.5 Flare” is good and fast — use it most of the time. “GPT Image 2.5 Sunburst” is steadier for edits and retouching, with finer detail, but slower. “GPT Image 2” is the previous generation, for keeping new images close to older ones. “Nano Banana” is Google’s model; try it when you want a different look.
NoteDefaults differ by tool: Flare for hero images, detail images and retouch; Nano Banana for style replicate; Sunburst in Canvas.
Step 3 of 5
Quality: start with Light
Quality is how carefully the image is drawn. “Light” is fastest — for little text or a first look. “Standard” is enough for everyday hero images. “High” helps with dense text, several products in one frame or edits: sharper text and better placement, but slower. “Superfine” and “Ultimate” sit under “More tiers” for large prints and campaign heroes.
Save creditsOn the same model, every tier up costs more. Make one Light image, then step up once the direction is right.
Step 4 of 5
Resolution: depends on where it goes
“SD 1K” is enough for mobile and most marketplace listings; “HD 2K” for large desktop images; “UHD 4K” for print or heavy cropping. Quality and resolution together set the price — see the table below.
Step 5 of 5
“Low / Medium / High” in Canvas
The “Low / Medium / High” button left of “Send” in the Canvas input is how deeply the assistant thinks, not image quality. Use “Low” for everyday edits; “Medium” or “High” for a whole set or a complex request, which uses a few more credits per message. Accounts that have never purchased can use “Low” only.
Step 1 of 5
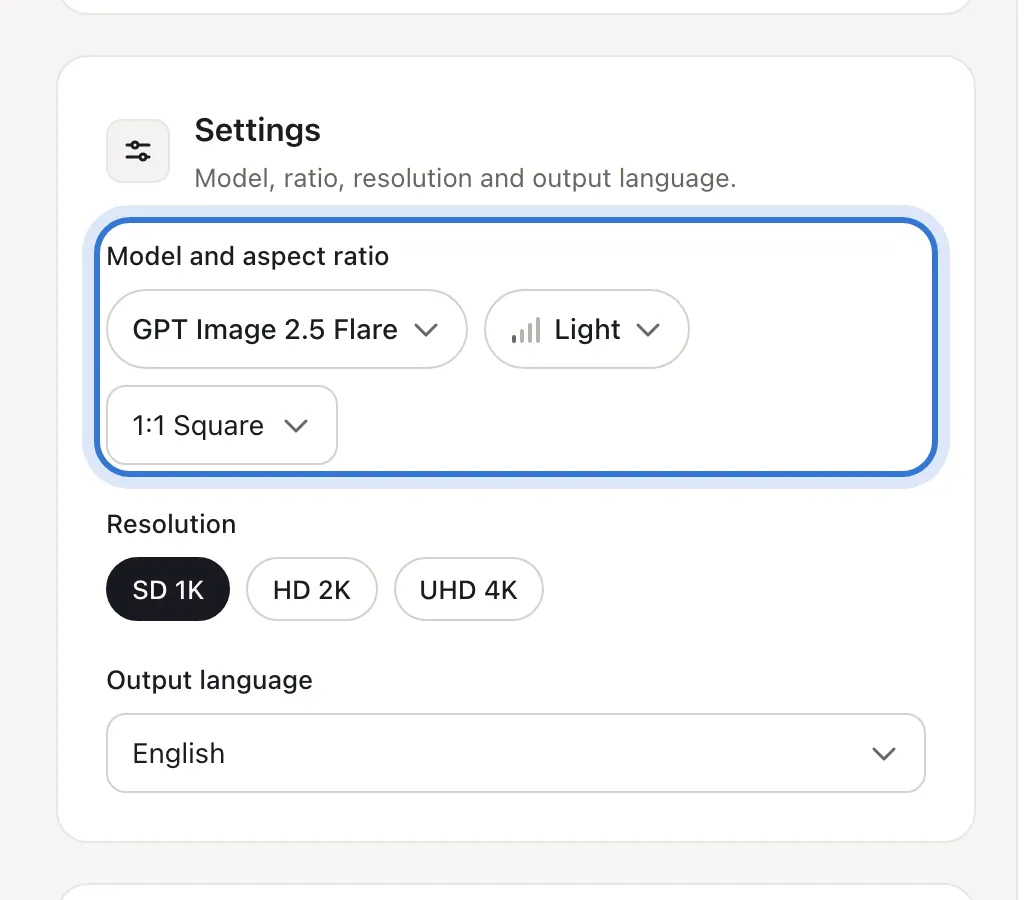
Click the highlighted area to continue
How credits work
Hero images, detail images, retouch and clothing use GPT Image 2.5 Flare by default. These are its per-image prices; higher quality and resolution cost more.
| Quality | SD 1K | HD 2K | UHD 4K |
|---|---|---|---|
| Light | 50 | 60 | 70 |
| Standard | 60 | 80 | 105 |
| High | 105 | 190 | 290 |
| Superfine | 155 | 305 | 480 |
| Ultimate | 300 | 630 | 1020 |
Credits per image. Sunburst costs the same as Flare at every tier.
- Failed generations are refunded automatically — no need to contact support.
- Hero images, detail images and retouch at the default setting (Light · SD 1K) cost 50 credits per image; style replicate costs 60 by default.
- Hero images, detail images, style replicate, retouch and clothing show “About N credits · Balance M” under the generate button. That number is what you pay.
- Detail page plans are free for accounts that have never purchased; after a purchase each module costs 5 credits.
- Video is billed per second: Seedance 2.0 costs 94 credits a second at 720p and 233 at 1080p. The page shows the total before you start.
- Canvas shows no total before you send: the assistant uses a few credits per message, and images are charged by model and resolution.
Related questions
Did this lesson help?