Editing images in Canvas
Put an image on the board, select it, and say how to change it: new background, new text, a new scene.
What you bring
The result
Steps
Step 1 of 5
Know the board
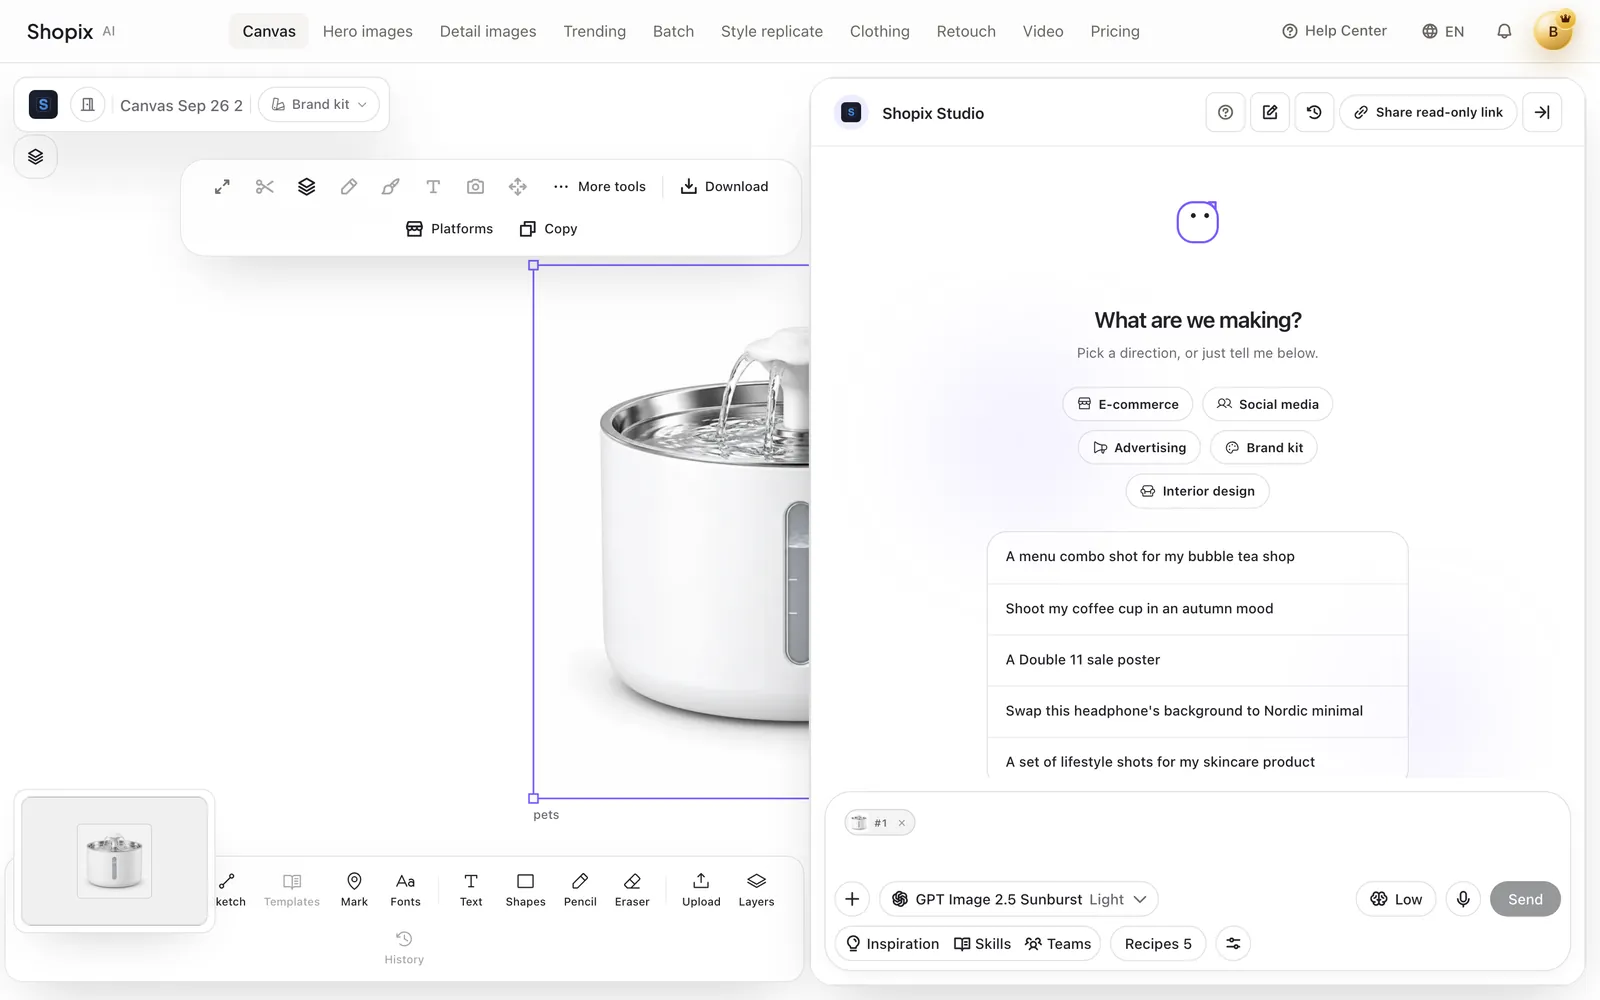
The left is the board with your images and every result; the right is the assistant — type requests in the box at the bottom. The bottom toolbar uploads, adds text and marks. Not sure where to start? Tap a direction or a sample request in the assistant.
Step 2 of 5
Put the product on the board
Press “Upload” in the bottom toolbar, or drag an image onto the board. A new image is selected automatically and an image tag appears in the input, meaning the assistant will use it.
Step 3 of 5
Say everything in one go
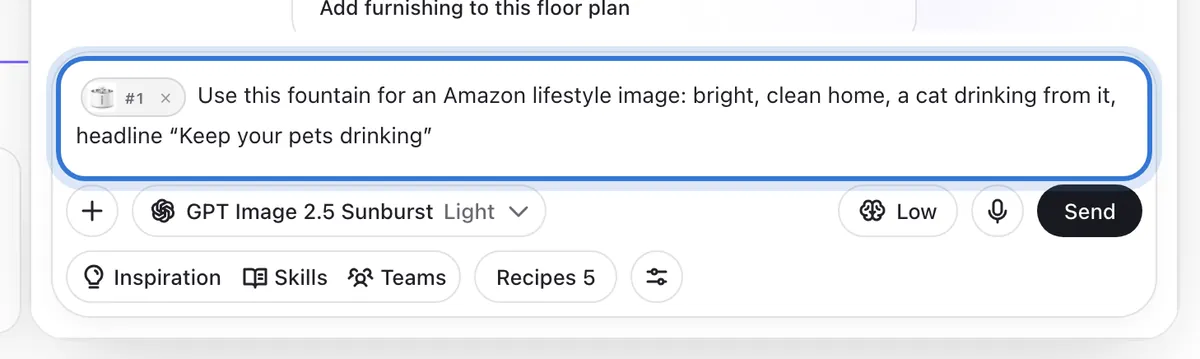
Say which image, what to make, the scene and any text on it, then press “Send”. Rather talk than type? Press the mic next to “Send”.
TipExample: use this fountain for an Amazon lifestyle image, bright clean home, a cat drinking from it, headline “Keep your pets drinking”.
Step 4 of 5
Keep editing the result
The new image lands on the board, selected. Say “change the background to a light oak table, keep everything else” and only that changes.
Step 5 of 5
Tools and download
Select an image and the toolbar above it offers HD upscale, remove background, text edits, expand, angles and more; “Download” saves it and “Platforms” exports marketplace sizes.
Step 1 of 5
Know the board
Not happy with the result?
- The assistant didn’t use my image
- Make sure an image tag is in the input before sending; if not, click the image on the board first.
- I asked for one change and everything changed
- Say “only change X, keep everything else”; or use “Scribble” in the toolbar to circle the area.
- I want to spend less
- Set “Low / Medium / High” (left of “Send”) to “Low” and keep the default Light tier.
Related questions
Did this lesson help?